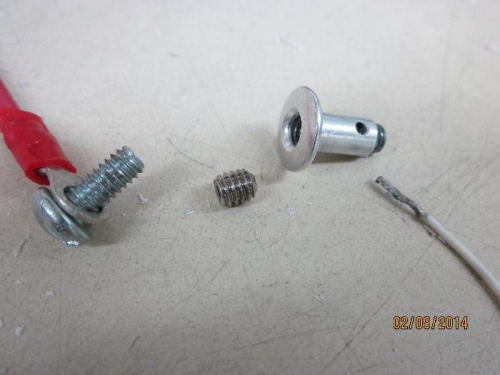
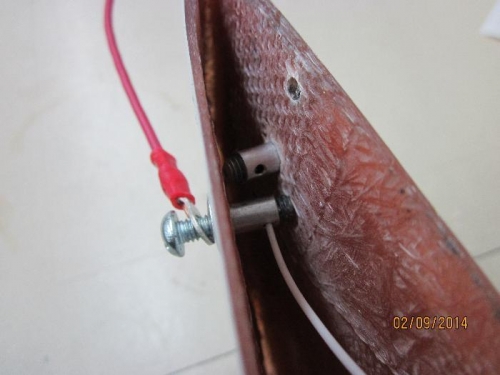
In case I need to install a taillight in the future, I installed a 1/4" OD plastic tube with two wires that run from just behind the cockpit up into the vertical tail tip. I envision the tail light would be attached to a contoured housing that would screw onto the fiberglass tip. Since the tip is riveted on, I needed a method to connect the light wires without removing the tip in the future. I used one half of a notebook "binder" screw that was through tapped for an 8-32 screw. I drilled a small hole to insert the wire near the end of the binder screw. I Locktite'd a set screw in the end of the binder screw as a backing to the inserted wire. A second set screw was inserted from the top. That will clamp the wire against the bottom set screw. The assembly was epoxied into the tip. There is still thread at the outboard end of the binder screw to attach the light wire in the future. Until then, the "electrical contacts" have very little protrusion above the fiberglass surface.
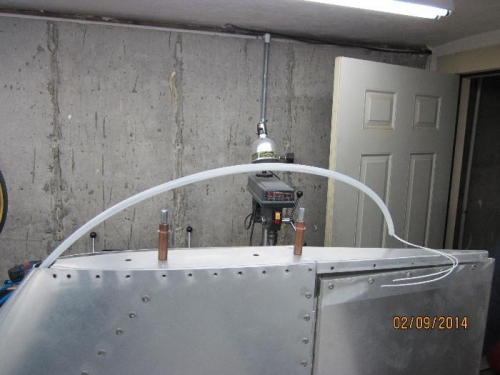
Riveted the autopilot pitch solenoid doubler plate to the bottom skin.
Sent in the paperwork and fee to the Massachussetts Departmrent of Motor Vehicles for the N531X state aircraft registration. MA requires a state registration for aircraft based here for more than 60 days. The annual sticker is similar to what gets applied to a license plate and needs to be displayed on the aircraft.